Vic's Blog
No results found.
Deploy an Eleventy Blog on Cloudflare pages with Strapi, MySQL, and Dokku on a Digital Ocean Droplet, part 3
Warning
here be dragons
Table of Contents #
- Deploy an Eleventy Blog on Cloudflare pages with Strapi, MySQL, and Dokku on a Digital Ocean Droplet, part 2
- Apps needed to proceed
- Download and Install MySQL services
- Configure Local MySQL services and choose Authentication Method
- Install and configure Dokku mysql plugin (Remote)
- (Remote) Playing around with our new MySQL database
- Sidequest? Adding a MySQL User for extra security
- Still to come...
Deploy an Eleventy Blog on Cloudflare pages with Strapi, MySQL, and Dokku on a Digital Ocean Droplet, part 3 #
Hello, welcome back! In the last post I made, I added SSH keys to my Dokku DO droplet, assigned it a floating IP, and added an A record in Cloudflare DNS settings so we can SSH into it any time with ssh vic@apps.vicstech.xyz. I then set up a static IP on my host PC, installed Fail2Ban on my remote Digital Ocean Dokku droplet, and whitelisted our host PC's IP on the remote server in both SSH and Fail2Ban's configuration. In addition, I created a new user to work under and disabled root login for extra security, and hardened both Fail2Ban and SSH configurations against attackers. See my previous post for more info.
For this post, I'd like to show you how to install the MySQL plugin for Dokku and see if we can test it out using MySQL workbench remotely.
Apps needed to proceed #
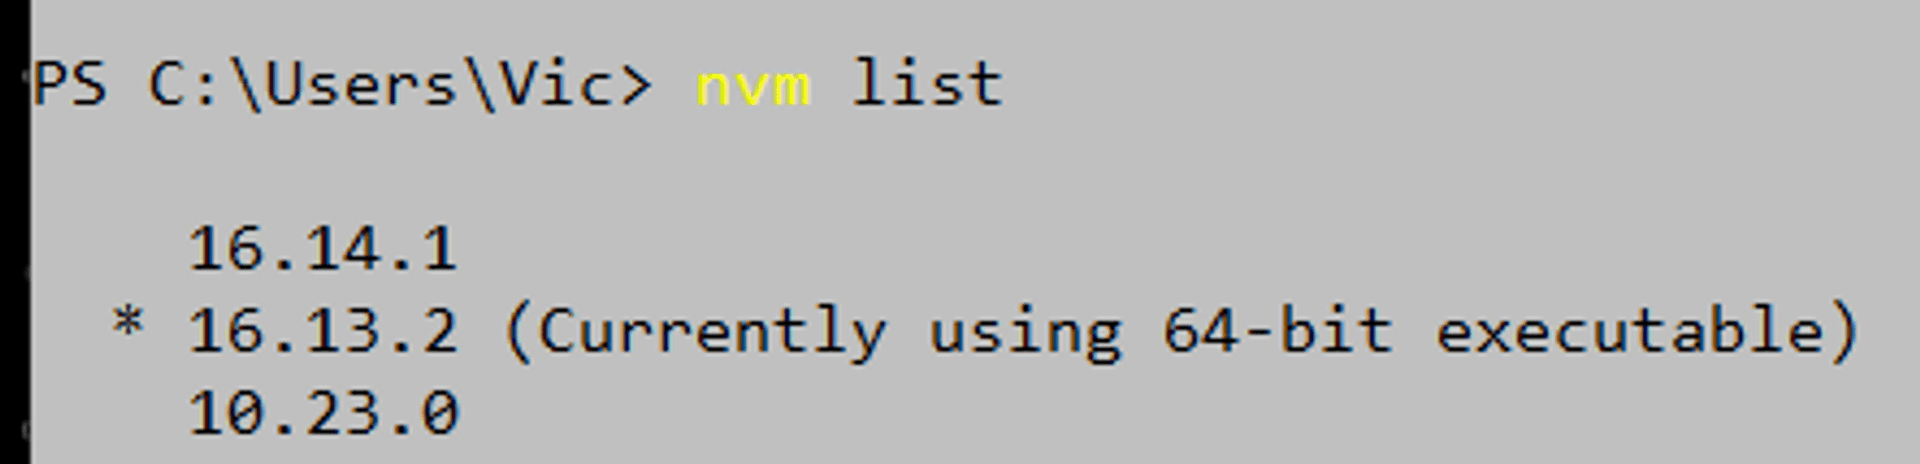
- Node.js v16.13.2. You can use nvm(node version manager) to install older versions of Node.js or manage multiple versions.
- npm (node package manager), which comes with Node.js. I'm using Git Bash in this tutorial to run npm but you could also use Powershell.
- MySQL Community Server v8.0.x.
Download and Install MySQL services #
As I've already installed and set up MySQL, I'll go ahead and relaunch the MySQL Installer now, but these instructions would work for a new installation: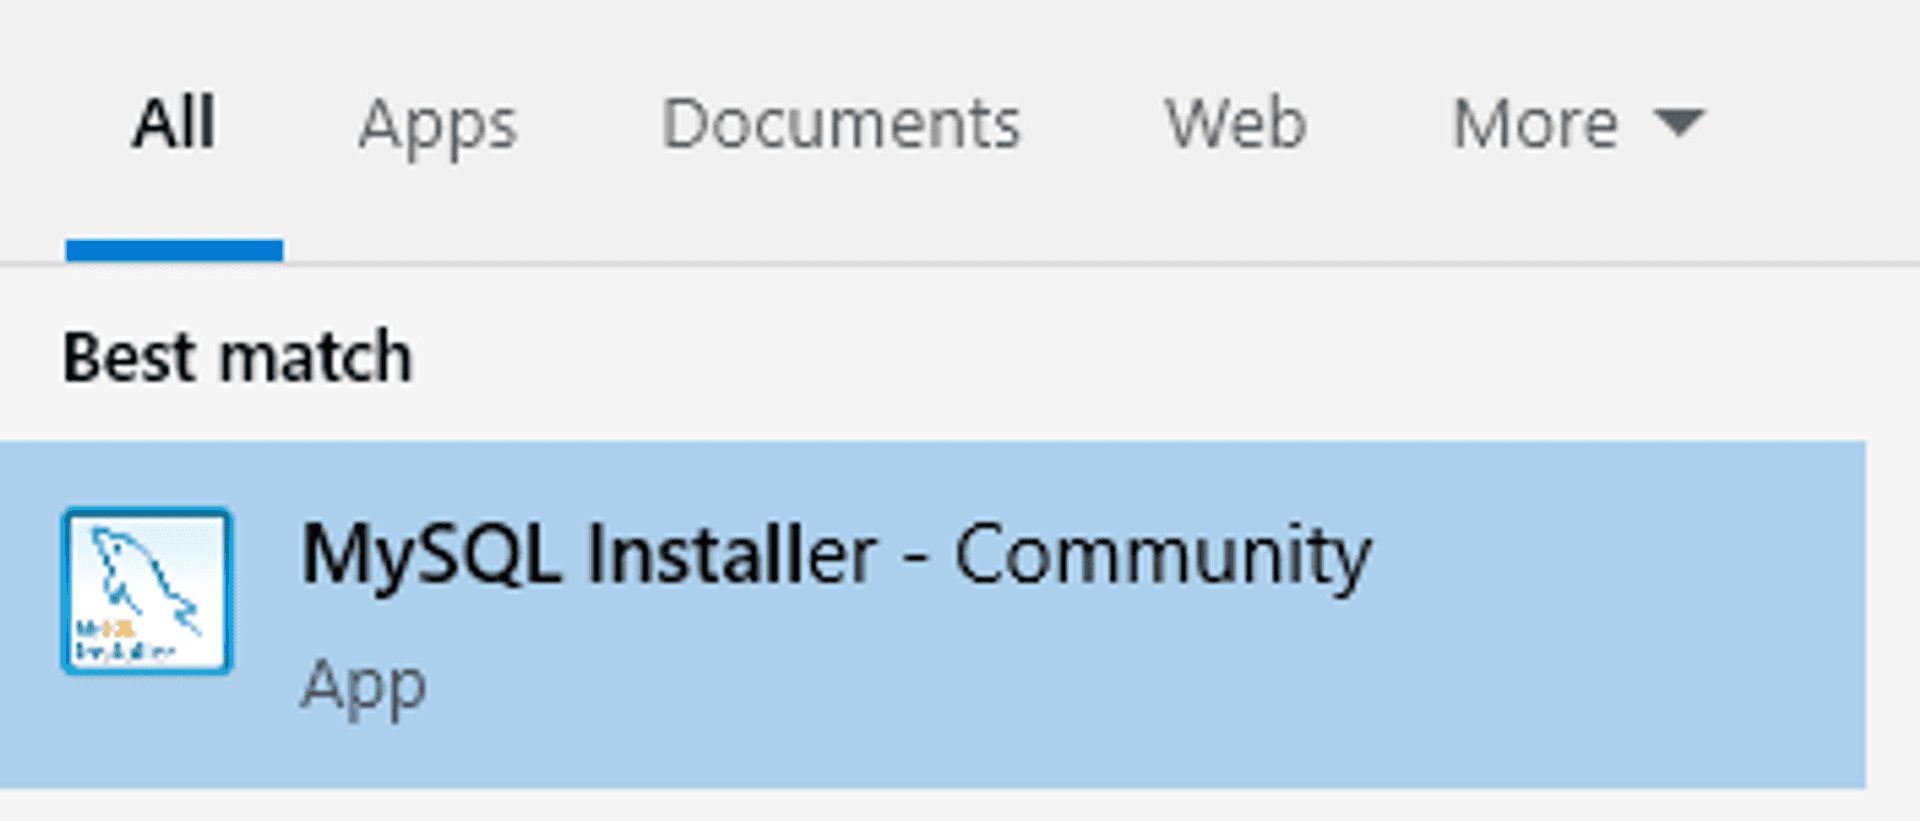
Note
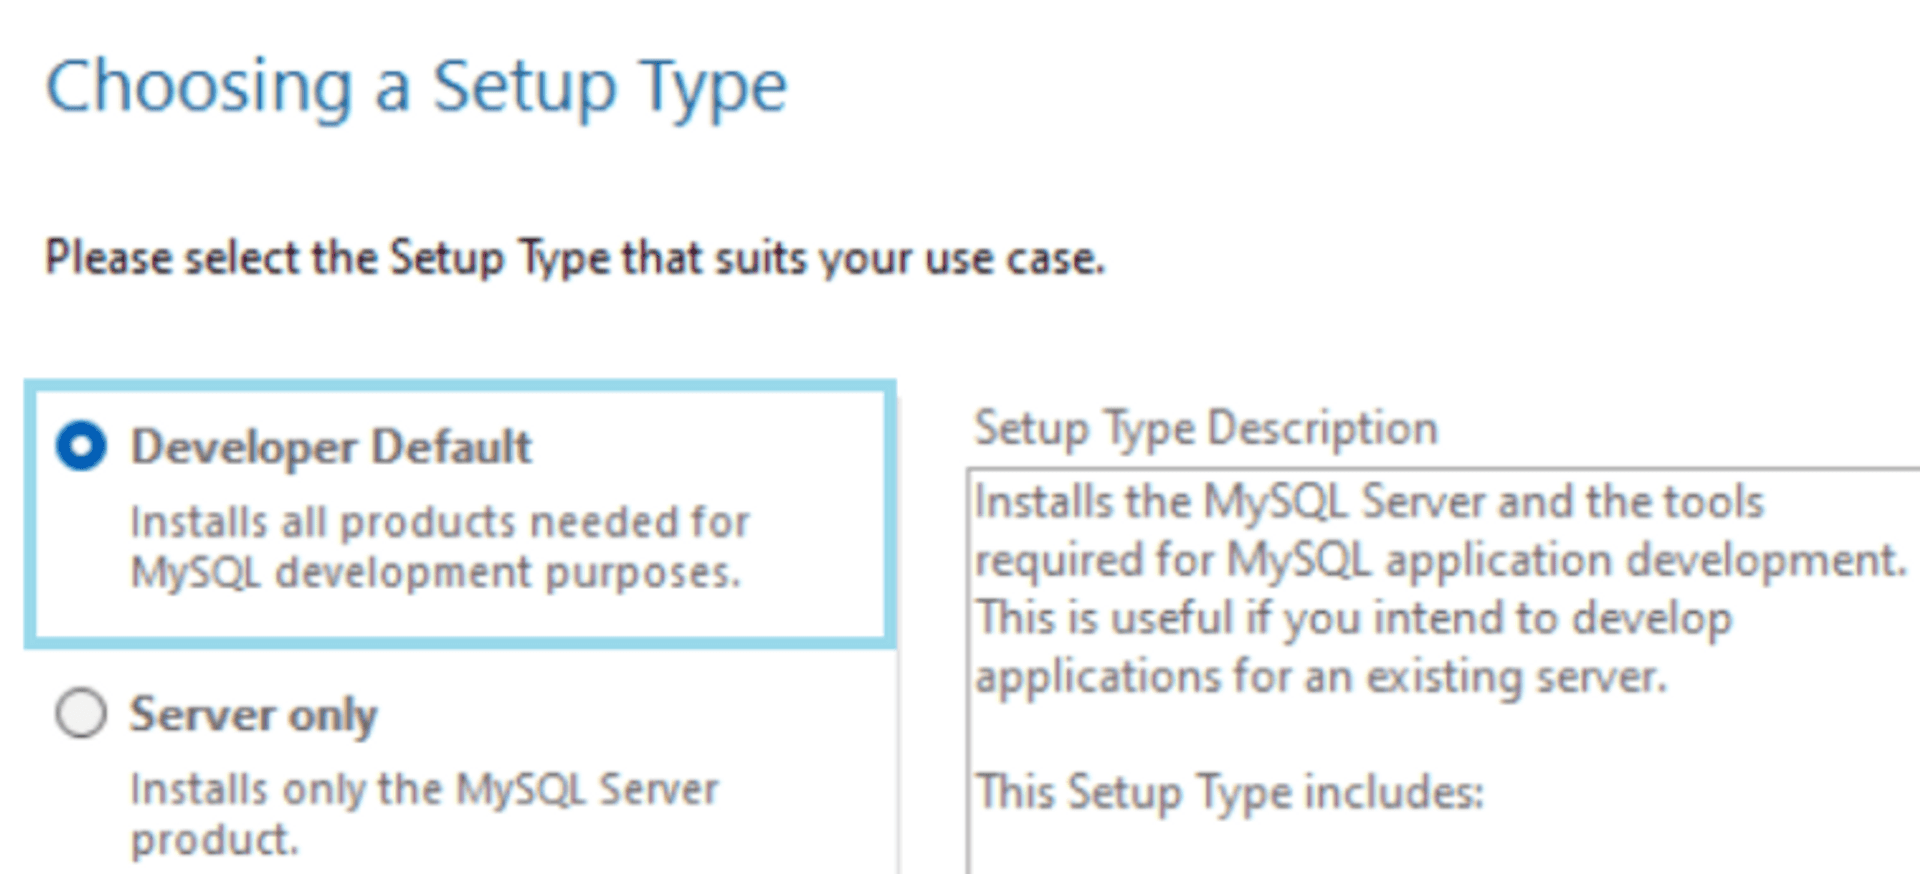
If you're installing MySQL, choose Developer Default option to install necessary services for Strapi. Let the installer install any missing requirements.
If you get a message like the following, go ahead and click next; you can install missing requirements later.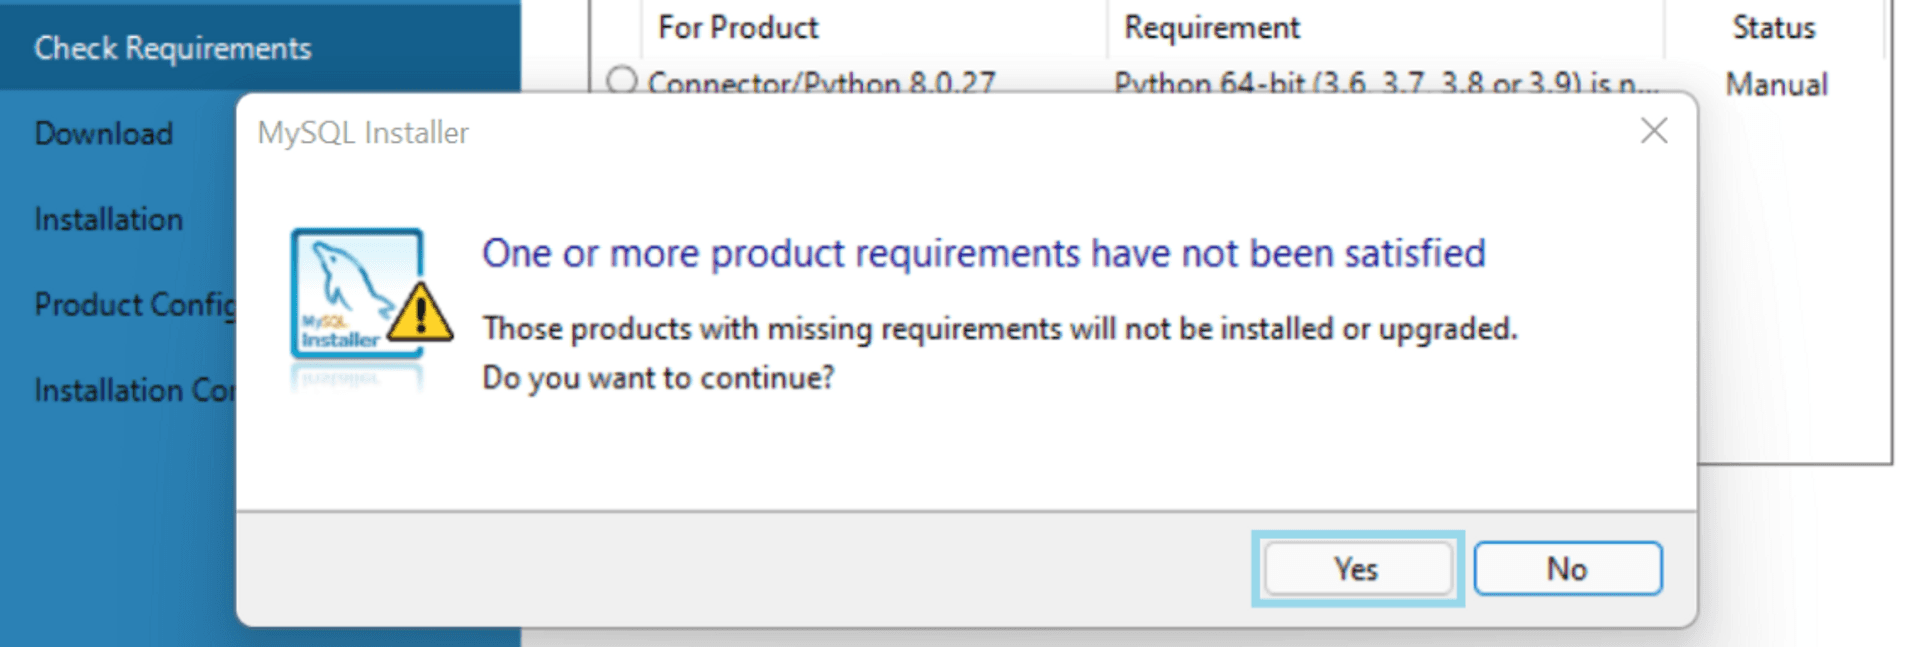
Let the installer continue and install any missing products.
Configure Local MySQL services and choose Authentication Method #
MySQL, which Strapi uses, has a client-to-server architecture, which interacts over a network. To configure the server, we need to do a MySQL Product Configuration for MySQL Server and MySQL Router.
MySQL Server will grant the Strapi application access to the DBMS. The DBMS then handles all queries and connections.
MySQL Router acts as a middleware, routing between our Strapi application and the MySQL Server.
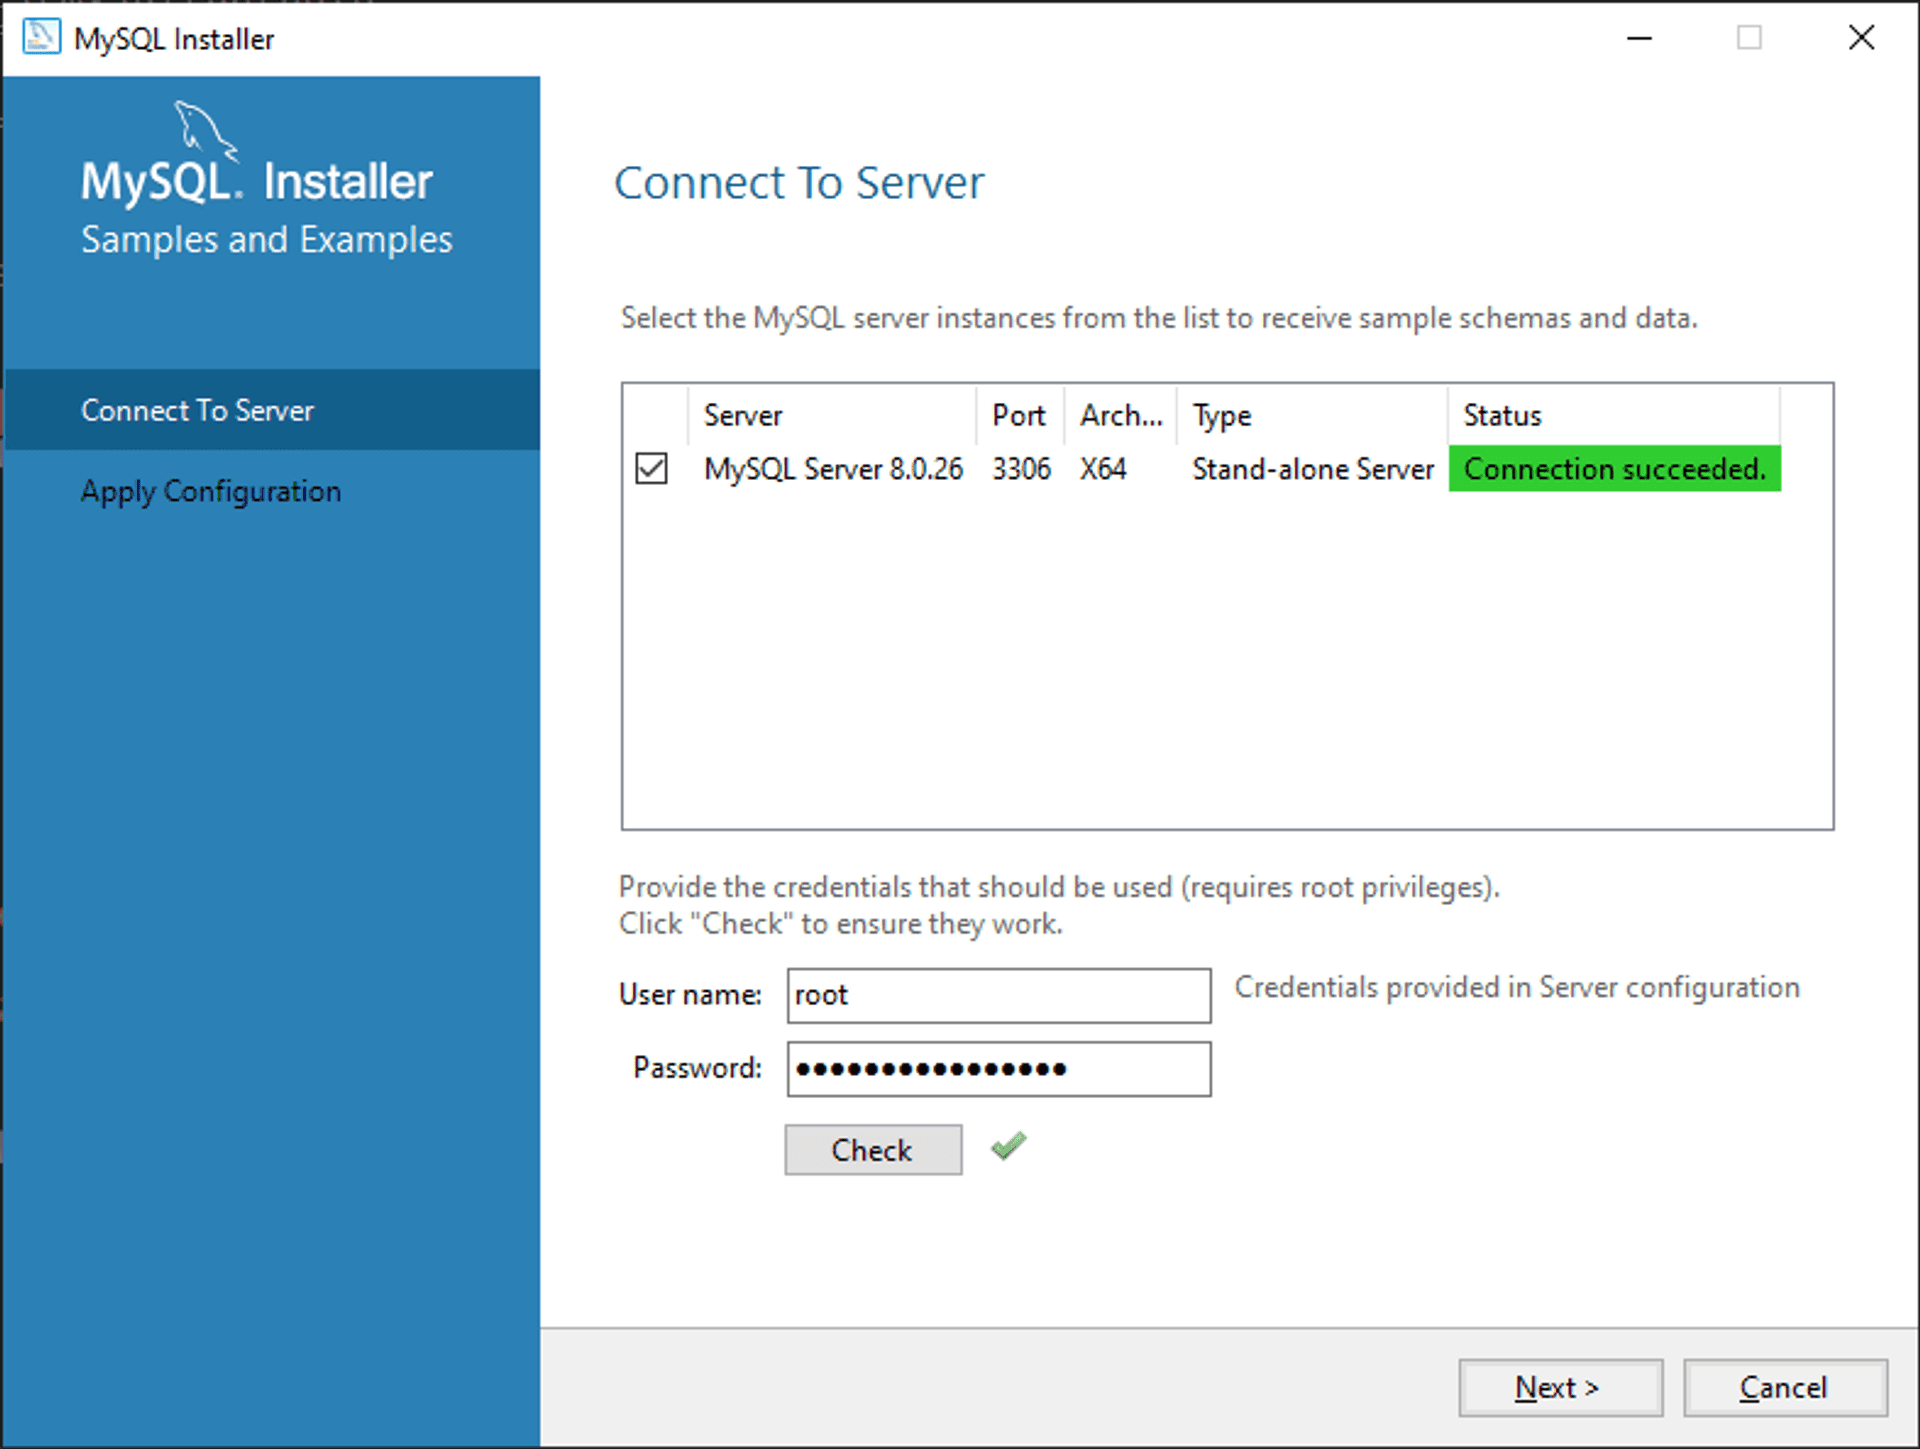
For the MySQL Server configuration type, choose "Development Computer", ensure your settings look like this: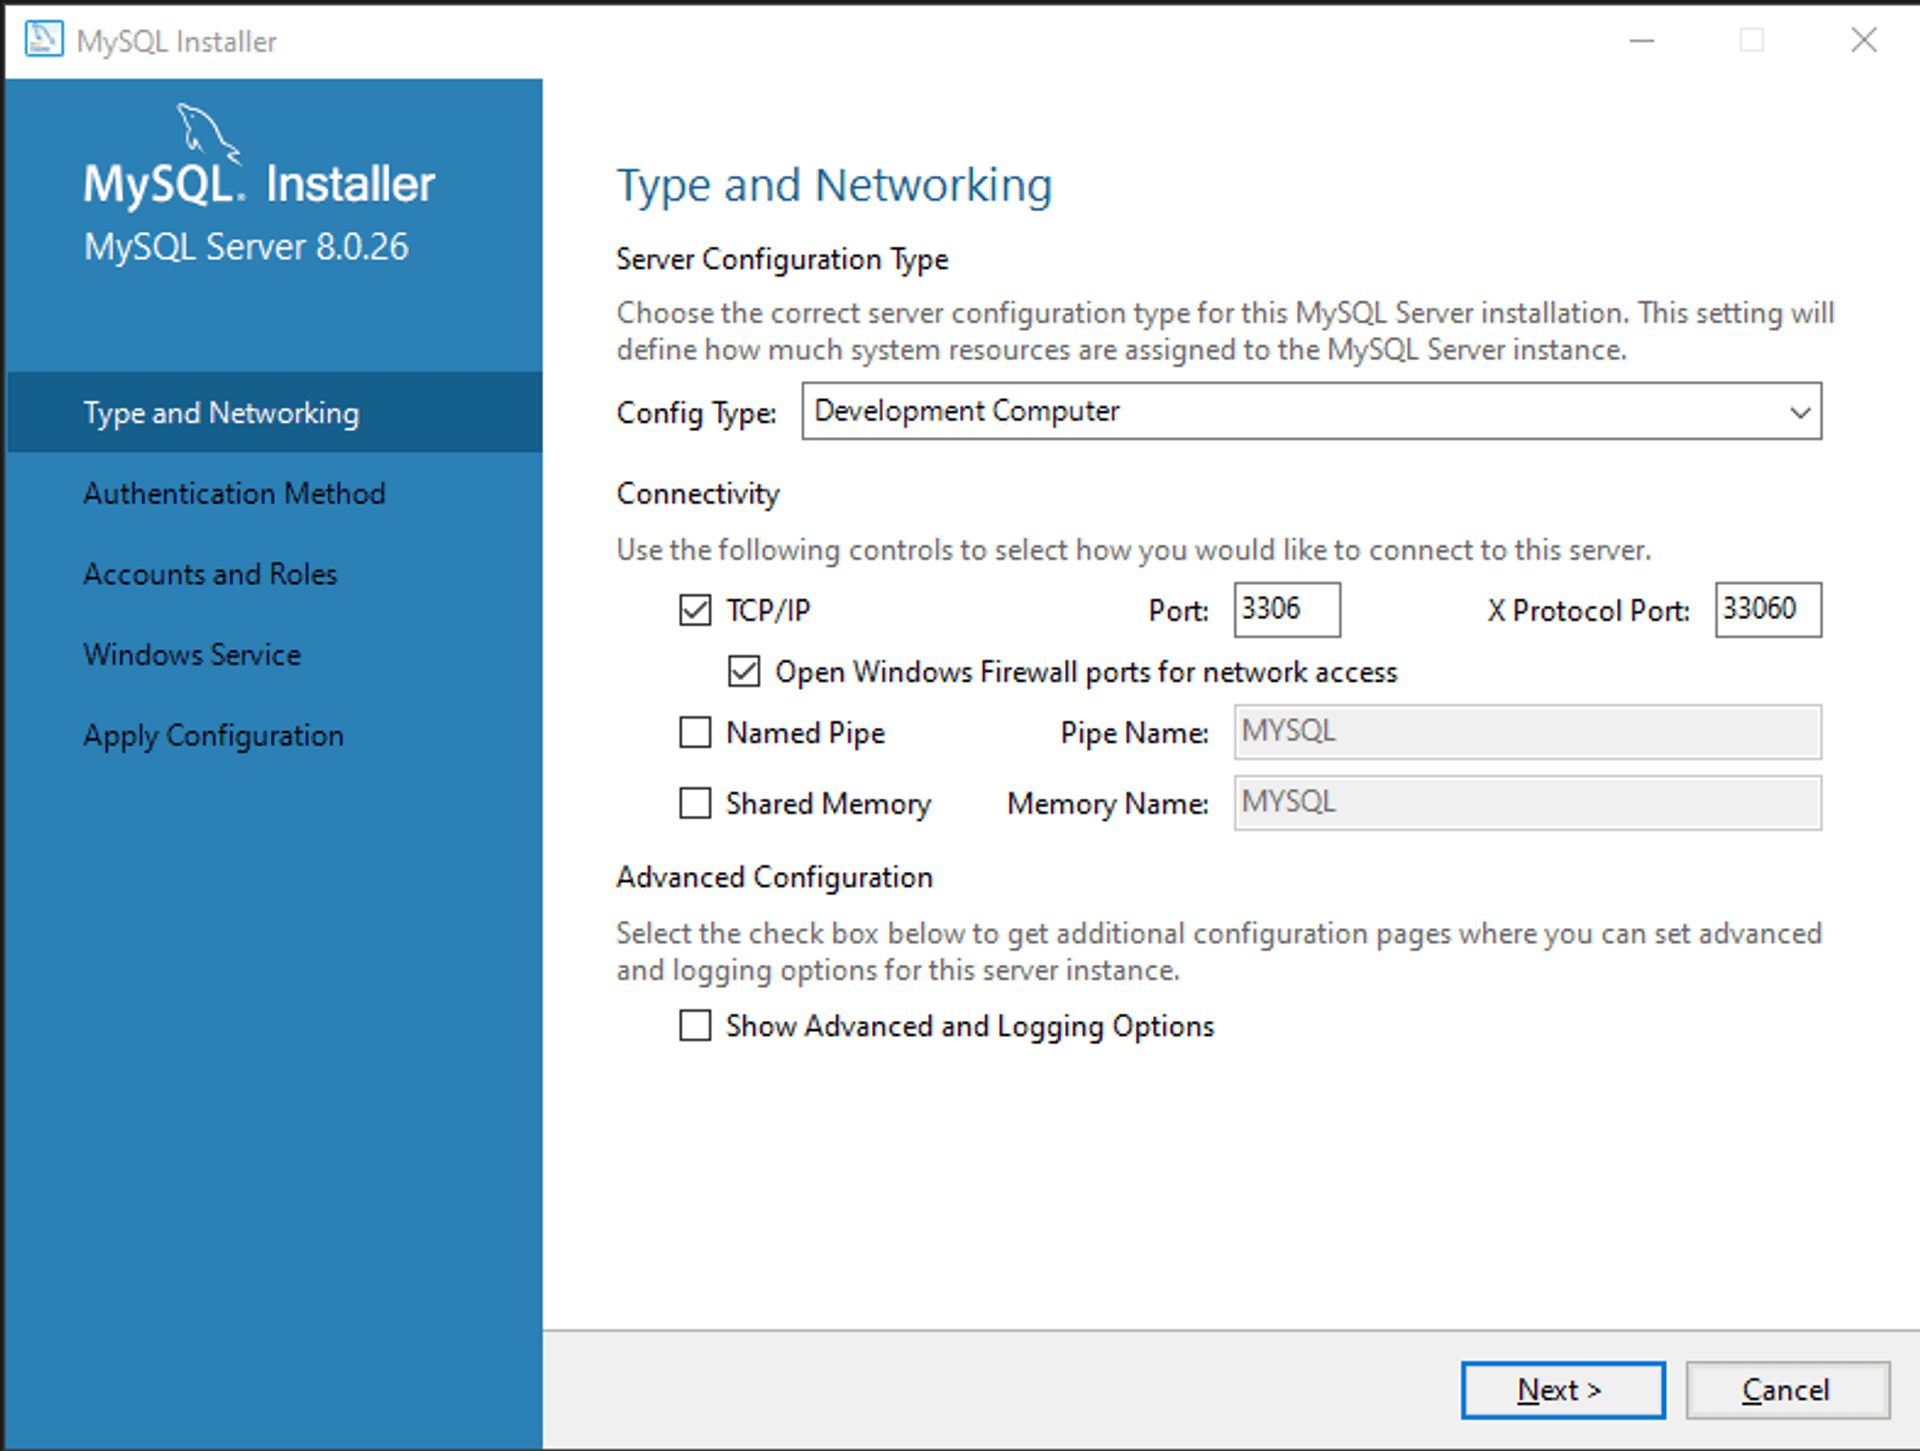
Attention
Important note: We need to set the authentication method to Use Legacy Authentication Method as I've had issues getting dokku's mysql plugin to work with Strapi using the default recommended authentication method.
Ensure your screen is like this: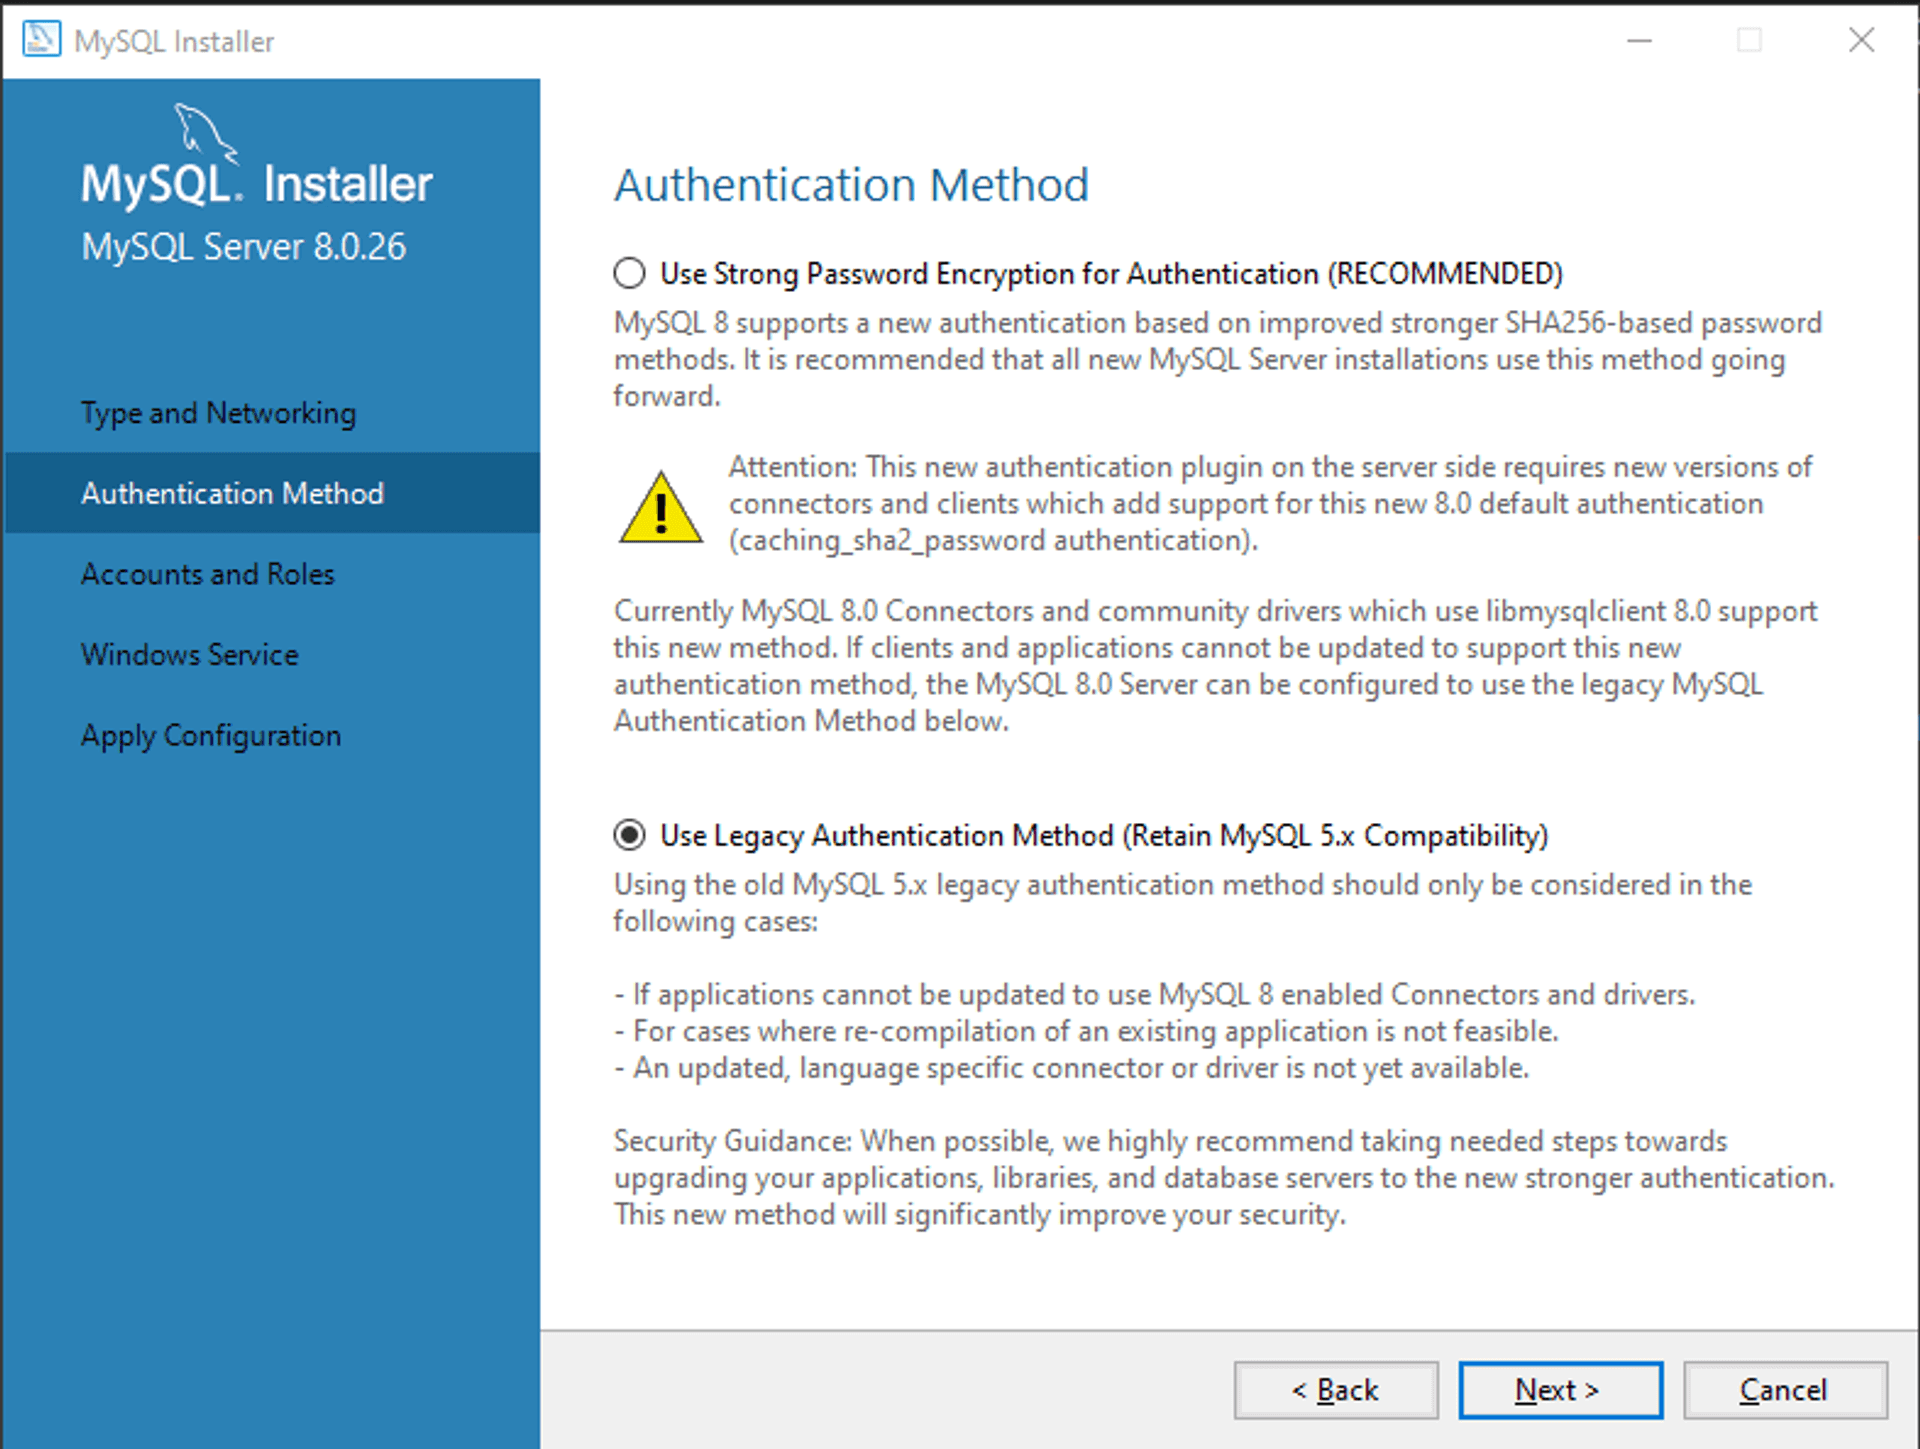
Enter a memorable password for our local MySQL root user, then click next. We want to ensure a successful connection as root user.
For Windows Service settings, leave everything default: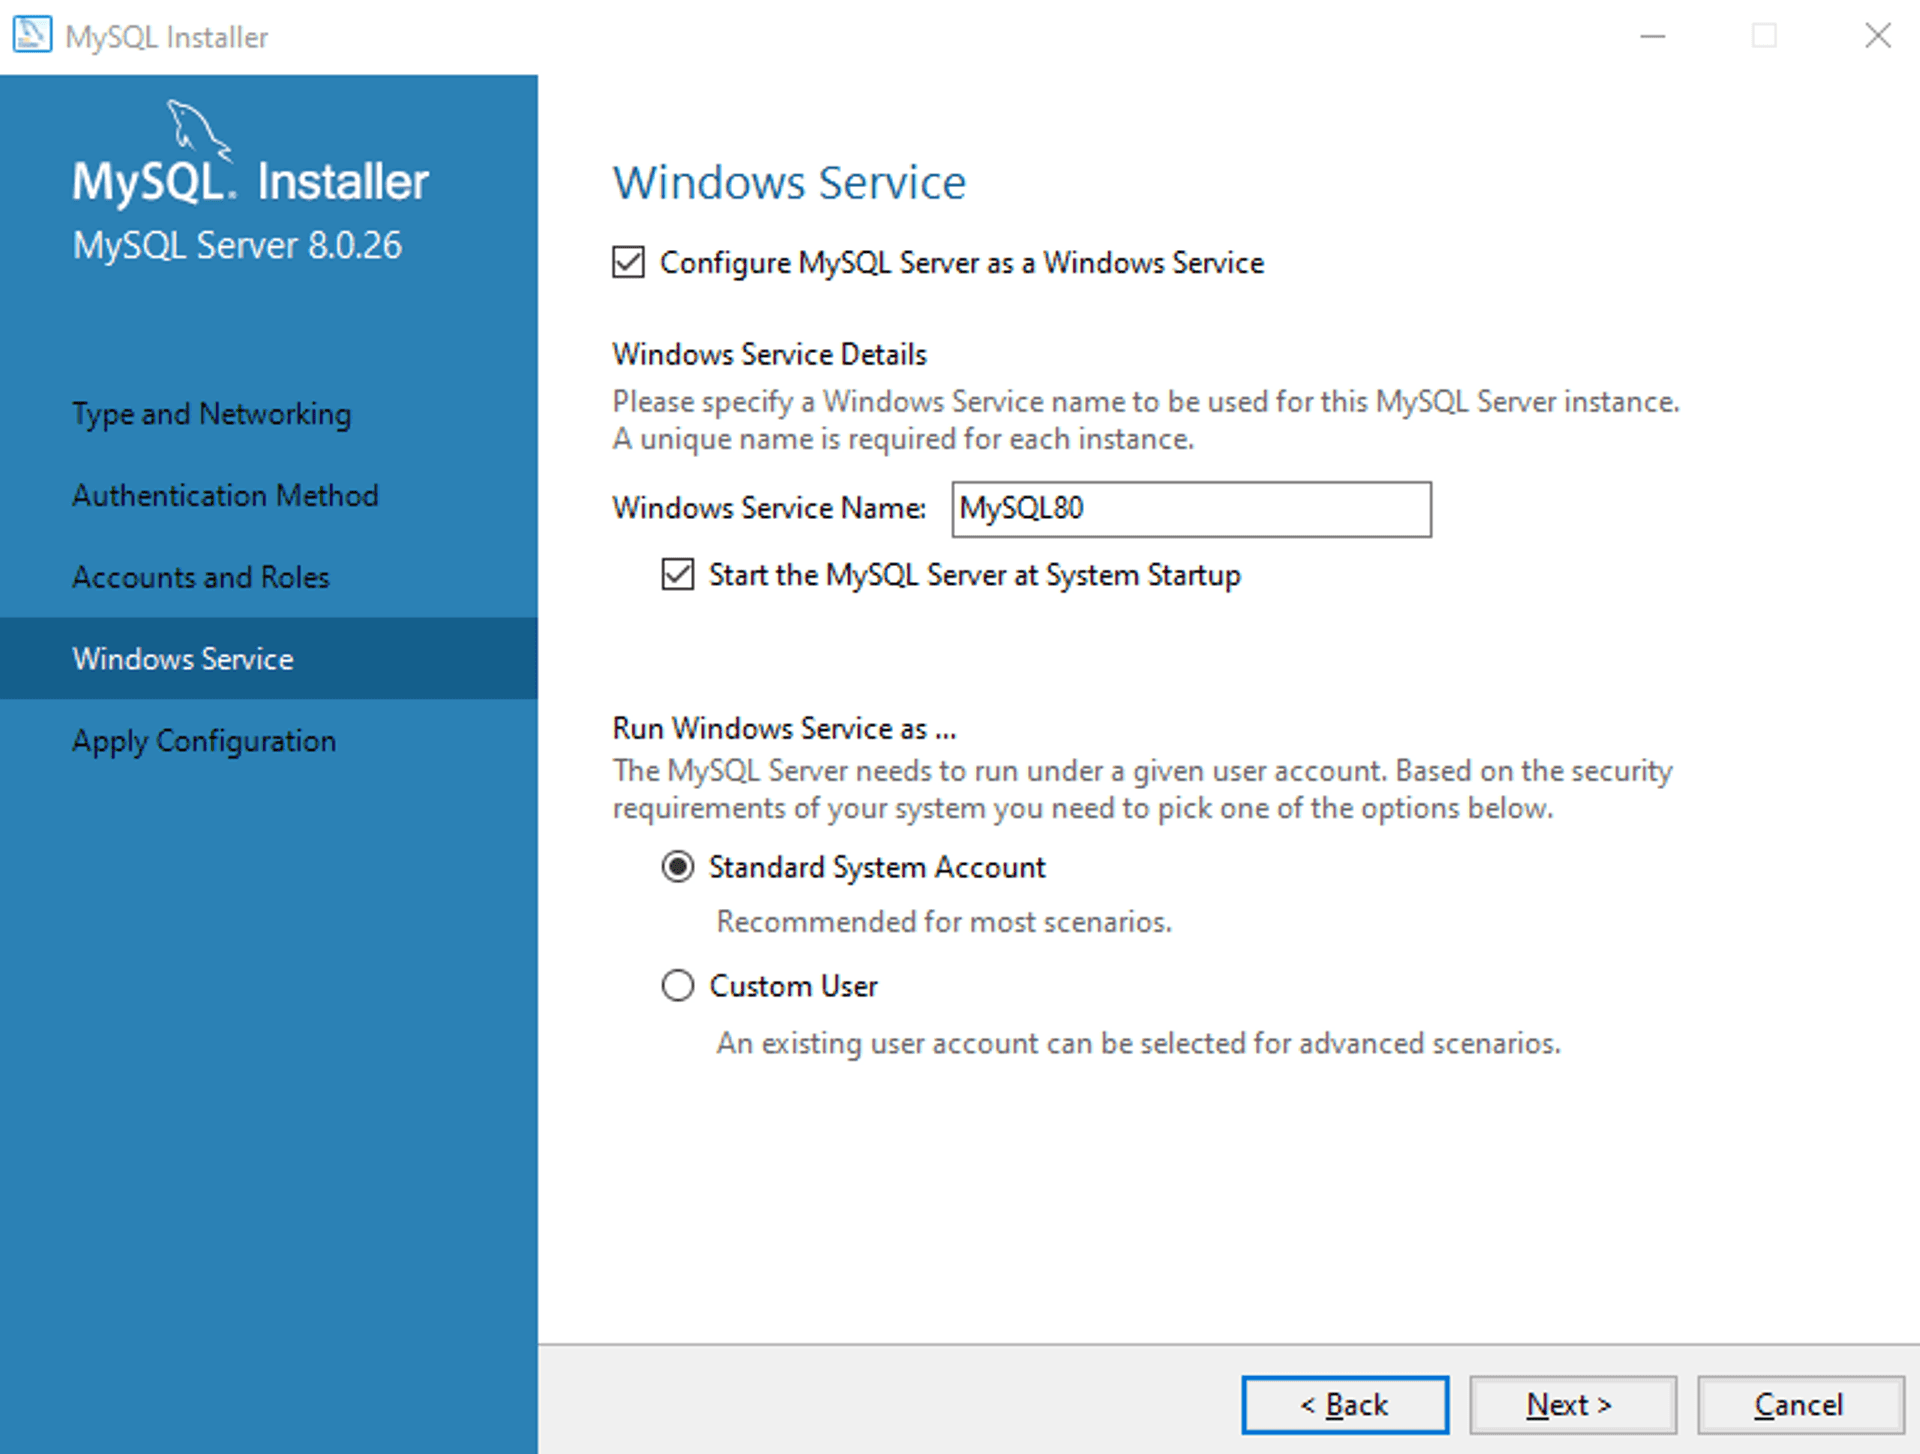
This will add the MySQL Windows Service to your system, and enable it whenever Windows restarts.
Last, click "Next" and then Apply Configuration by clicking Execute.
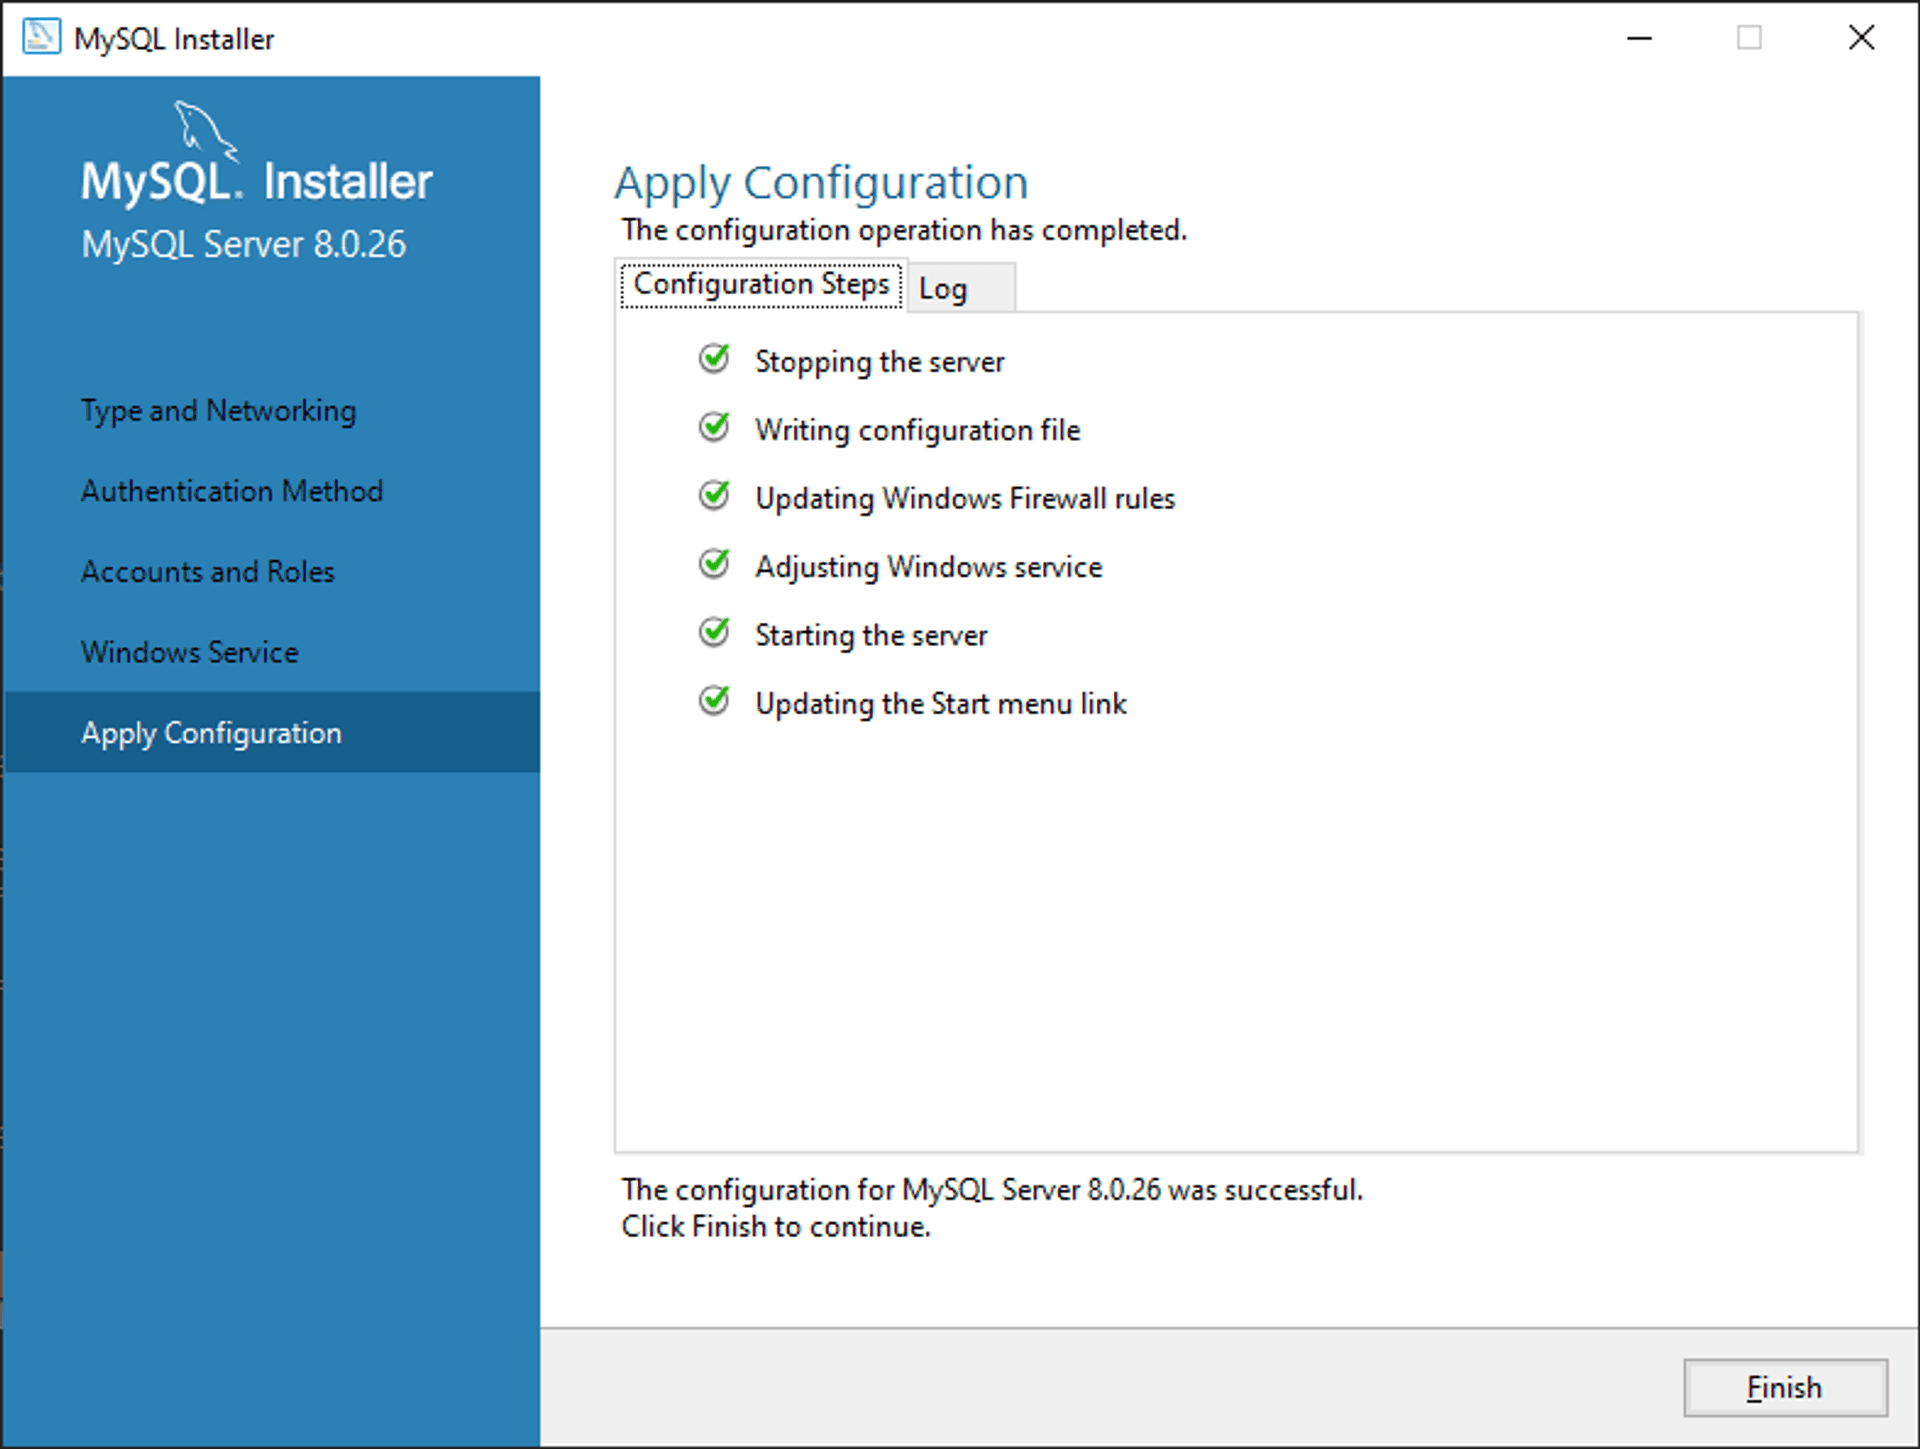
Click Finish. When prompted for Router configuration, leave it blank and continue.
Finally, enter your credentials in the test scripts for root user to execute the scripts.
Now MySQL Services and workbench should be successfully installed locally. 🌟
Install and configure Dokku mysql plugin (Remote) #
Now we have installed MySQL services and workbench on our local Windows machine. Next, let's install dokku-mysql plugin on our remote Dokku instance.
So far, we haven't touched a single Dokku command. Let's change that by installing the official dokku mysql plugin (currently defaults to mysql 8.0.28):
sudo dokku plugin:install https://github.com/dokku/dokku-mysql.git mysqlOutput: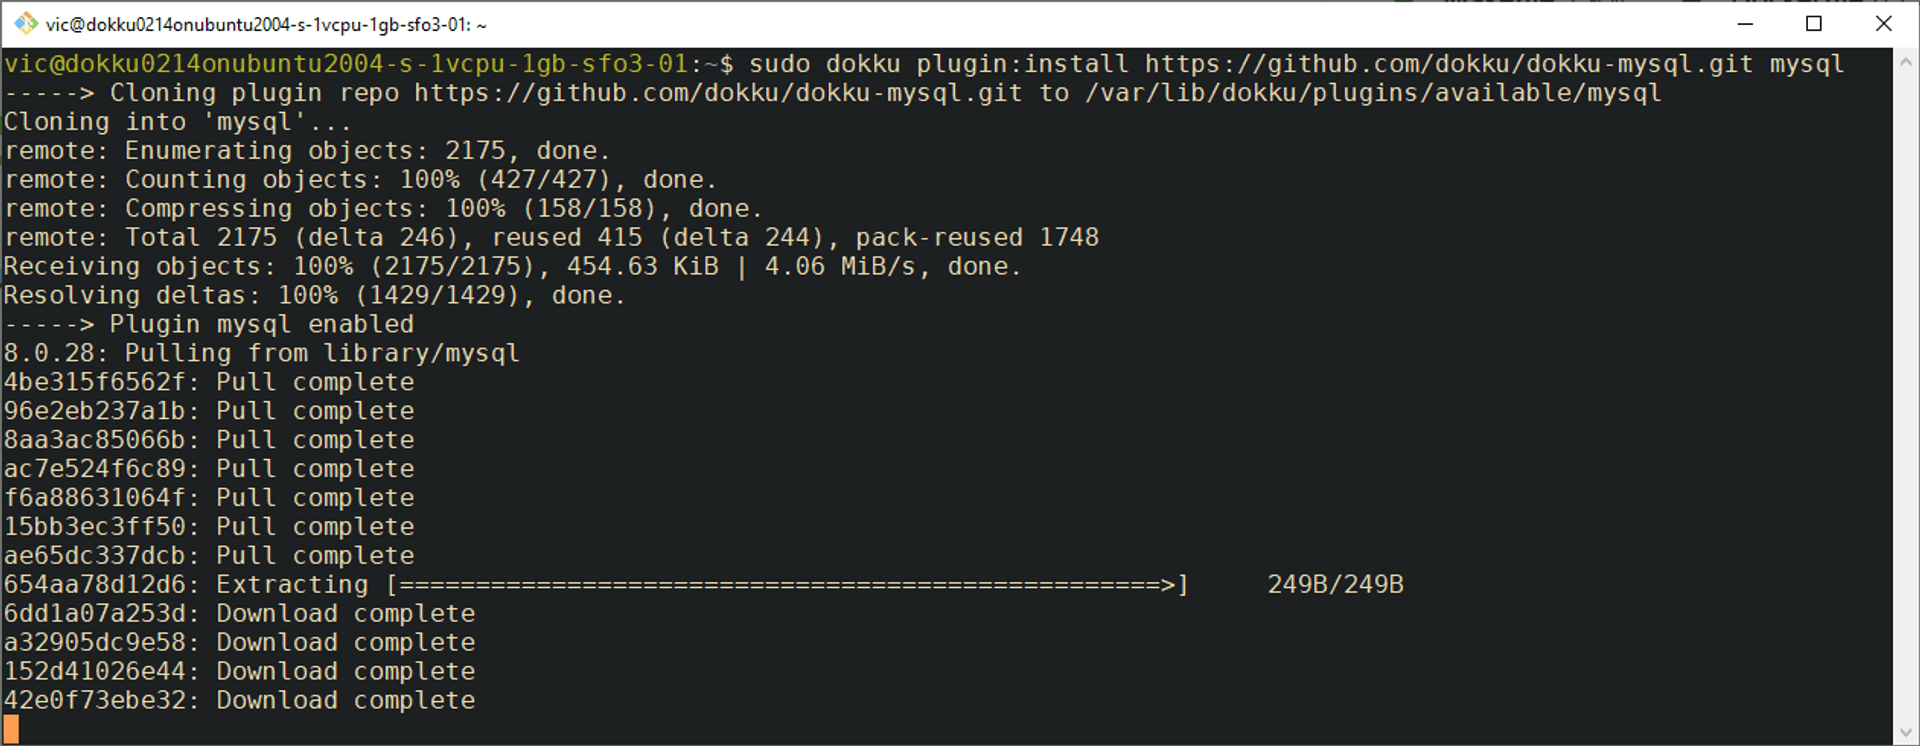
When it's finished installing, we can create a new database named db with the following command:
dokku mysql:create dbOutput: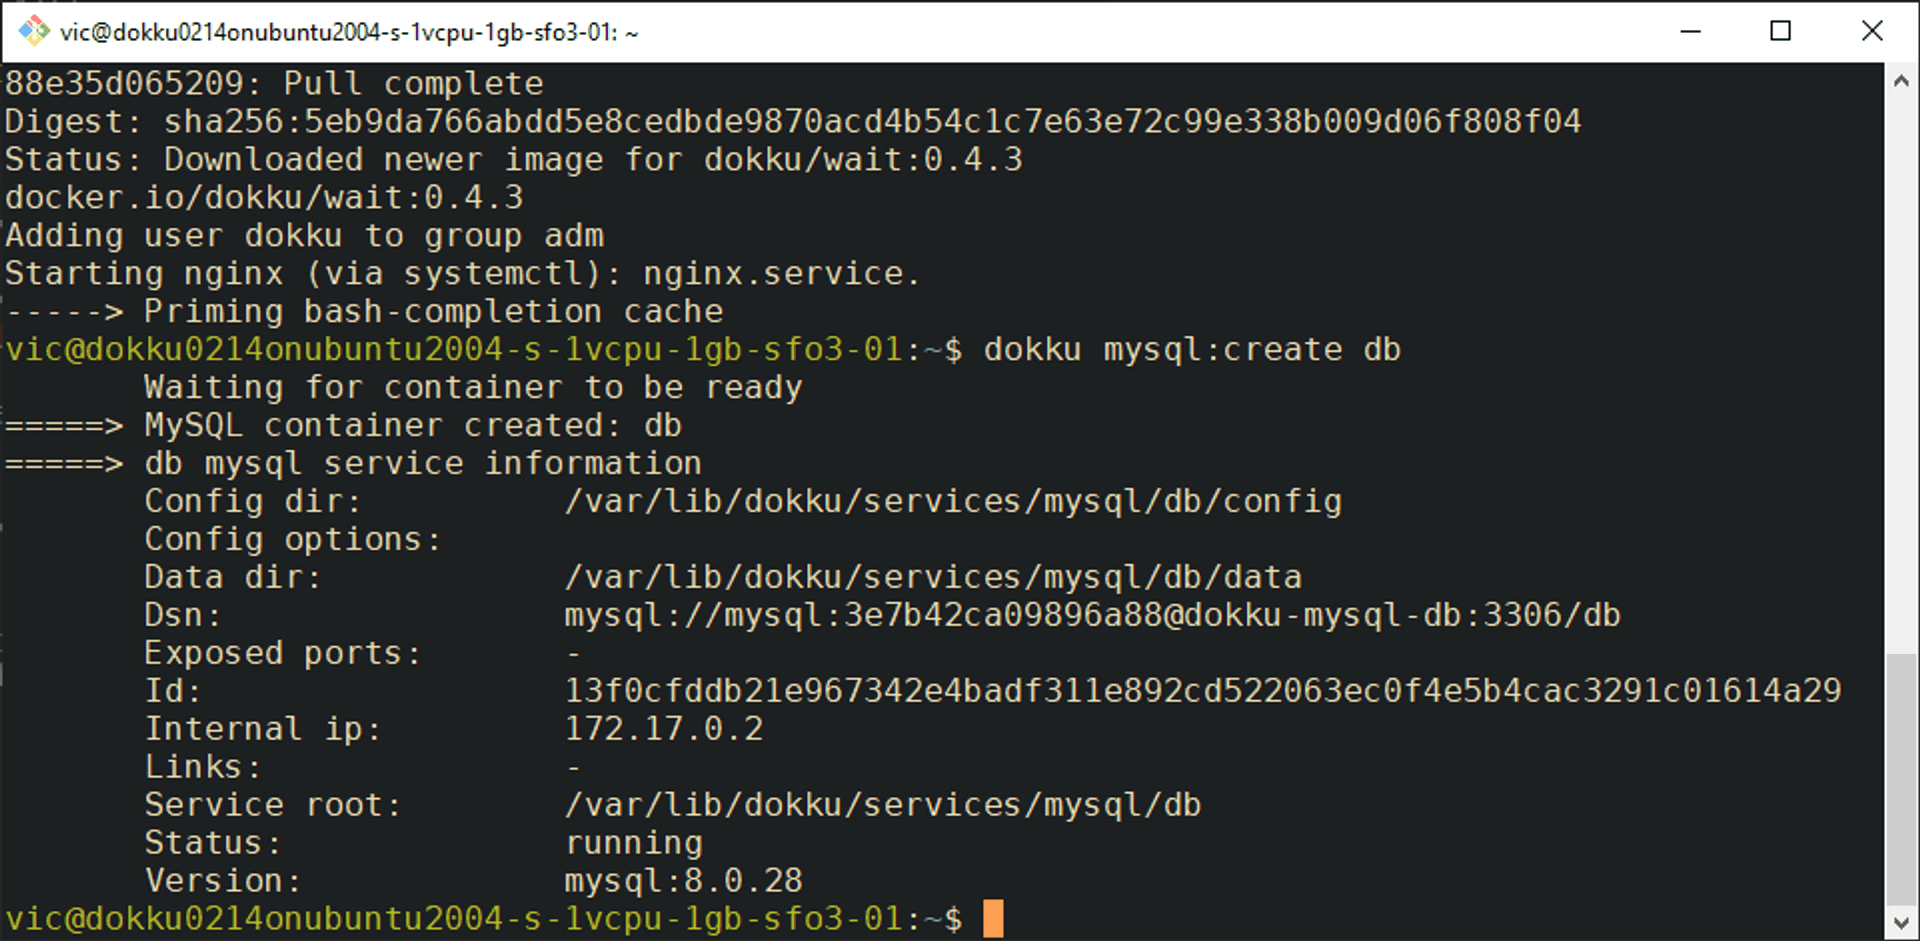
Note the Dsn:mysql://mysql:3e7b42ca09896a88@dokku-mysql-db:3306/db
We should expose port 3307 on our remote mysql instance so that we can test a remote connection with MySQL workbench.
dokku mysql:expose db 3307Output:--> Service db exposed on port(s) [container->host]: 3306->3307
Next, note the config directory: /var/lib/dokku/services/mysql/db/config
We can cat for the root password in this directory:
sudo cat /var/lib/dokku/services/mysql/db/ROOTPASSWORDTake note of it!
With the exposed port and root password, we should be able to remotely access the db database from MySQL workbench.
Create a new connection in MySQL Workbench home and input the following information:
Hostname: apps.vicstech.xyz
Port: 3307
Username: root
Click Test Connection and enter the mysql root password you just noted.
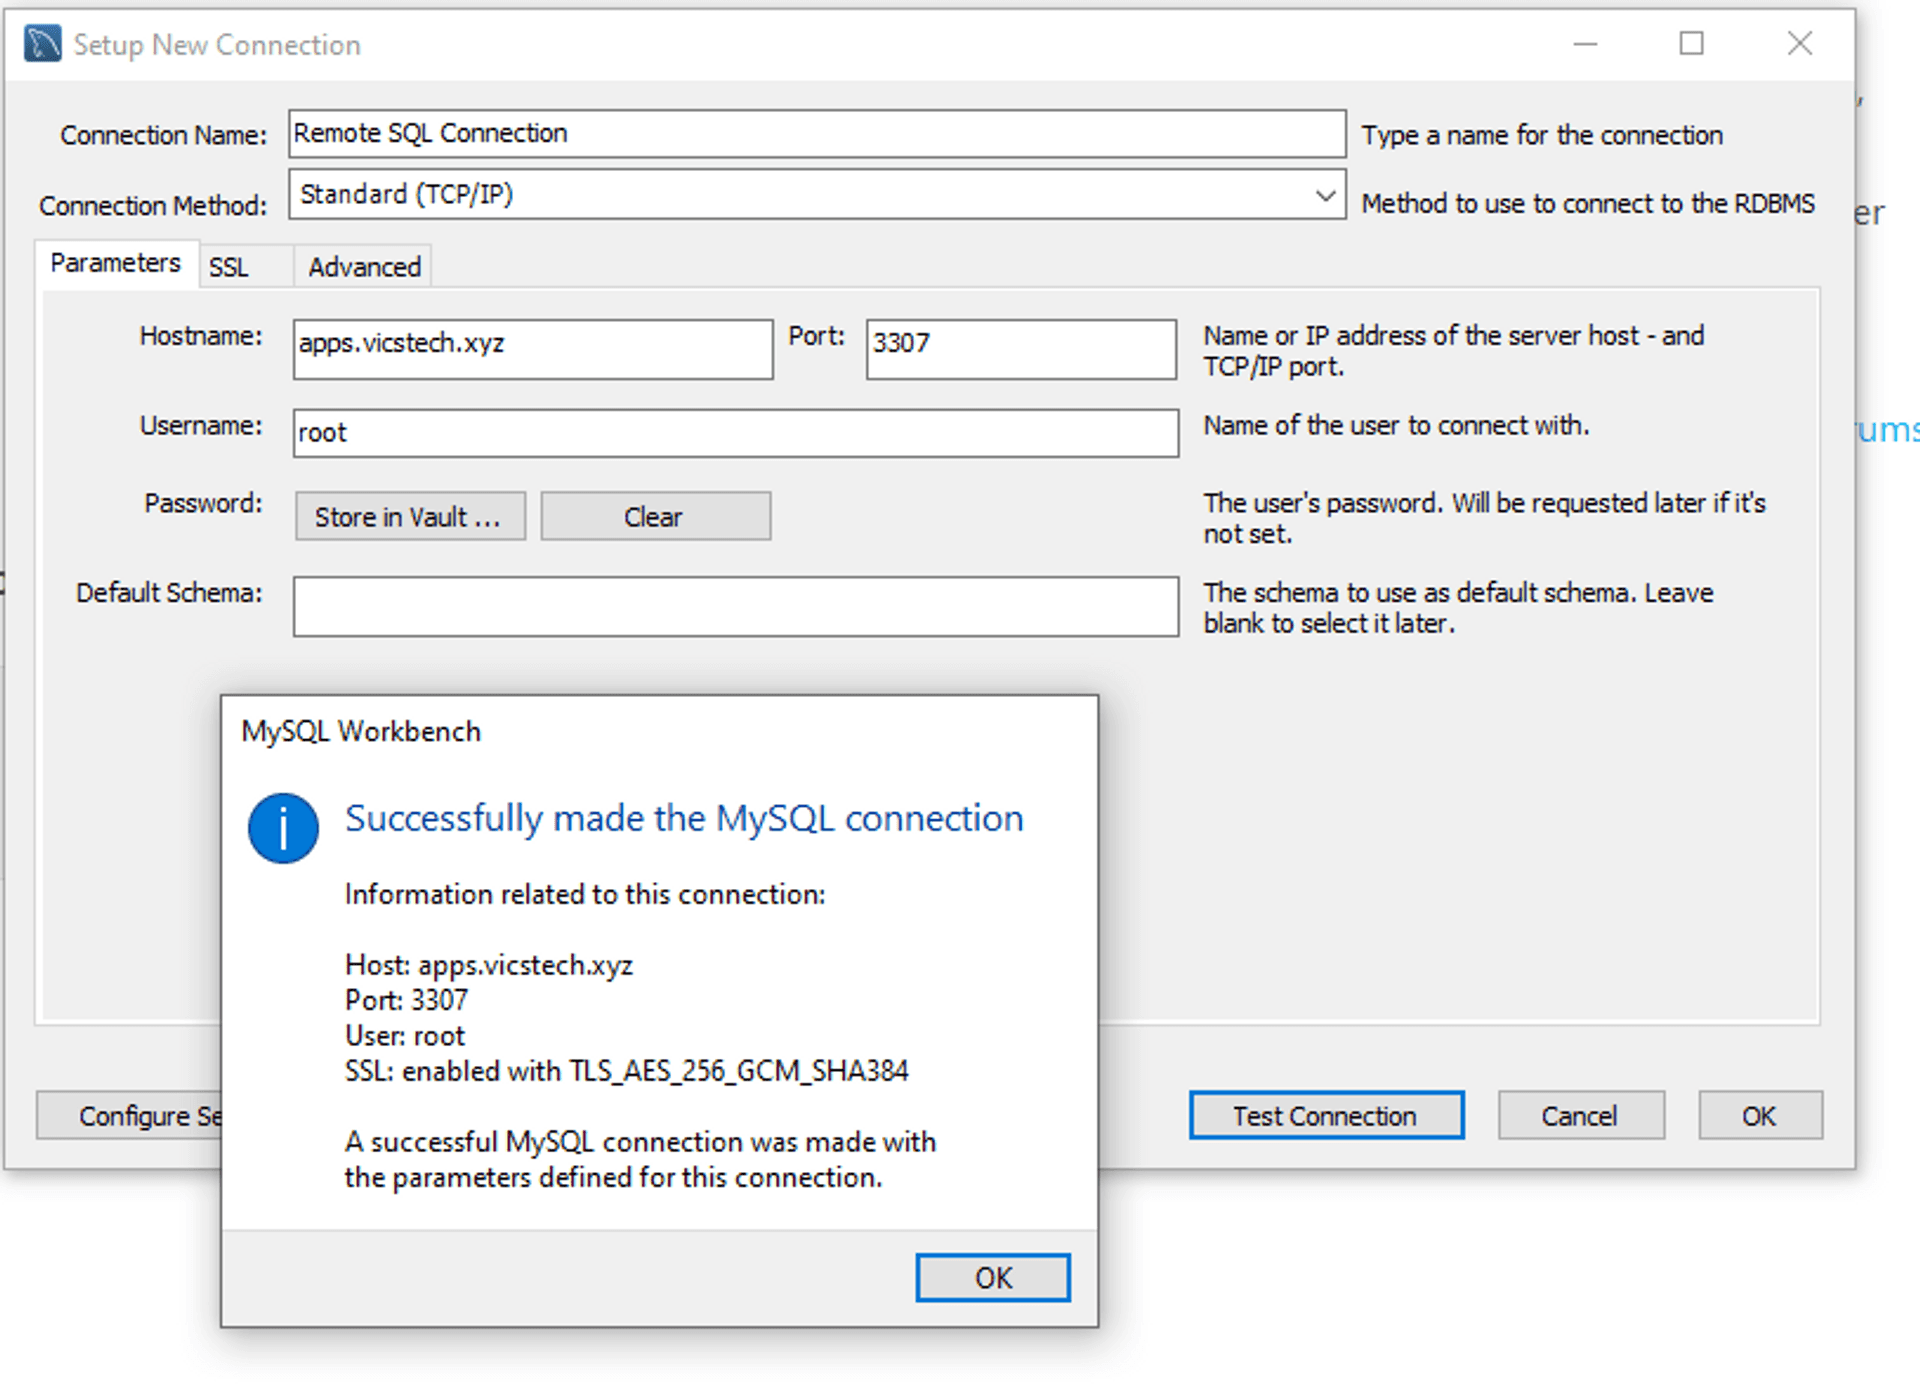
Success! 🌟 Some helpful tips for your new instance can be found on this gist.
(Remote) Playing around with our new MySQL database #
We can connect to our db as follows but note as we're a regular user we cannot edit our database on the server: dokku mysql:connect db
Enter your dokku db instance with the following command:
dokku mysql:enter dbThen, while in the dokku db bash instance, enter the following, and enter the password noted earlier when prompted:
mysql -u root -p
Now we're logged into our remote MySQL server as root.
Enter the following command at the root sql cli to see which authentication plugin our root user uses:
SELECT user, plugin FROM mysql.user WHERE user IN ('root');To connect Strapi with MySQL, we have to ensure the authentication plugin for our root user is mysql_native_password as our Strapi/dokku-mysql combo currently does not support the auth plugin that comes with MySQL 8.0.x, chaching_sha2_password.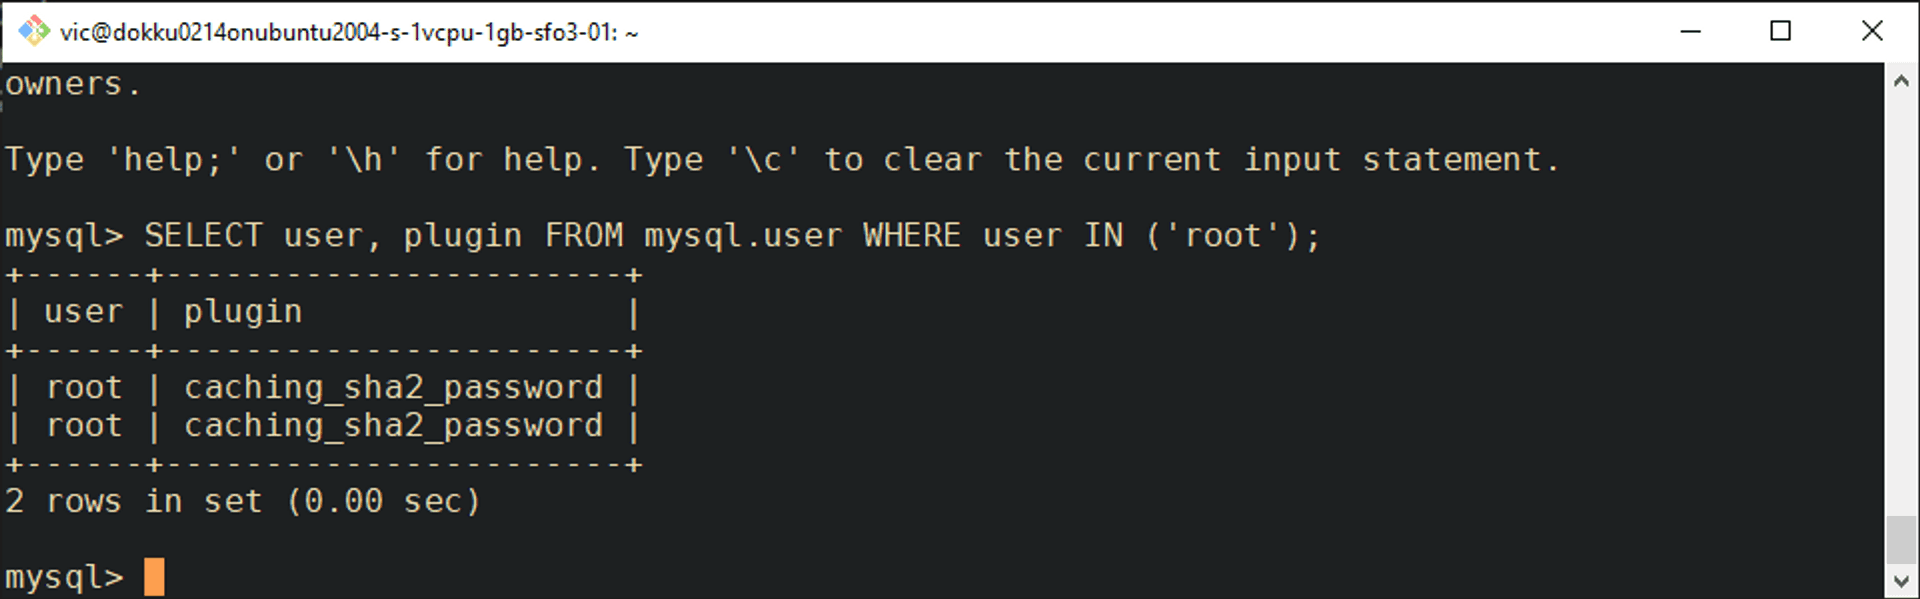
Note
Seeing 2 root accounts here is normal, one describes the rules for 'root'@'%' and the other for 'root'@'localhost'. I went ahead and changed both to use mysql_native_password.
Enter the following command, replacing password with a memorable root password (you can use the one from earlier, to continue testing queries in MySQL Workbench without trouble).
ALTER USER 'root'@'localhost' IDENTIFIED WITH mysql_native_password BY 'password';Then:
ALTER USER 'root'@'%' IDENTIFIED WITH mysql_native_password BY 'password';Then refresh privileges with this query:
flush privileges;Resulting output: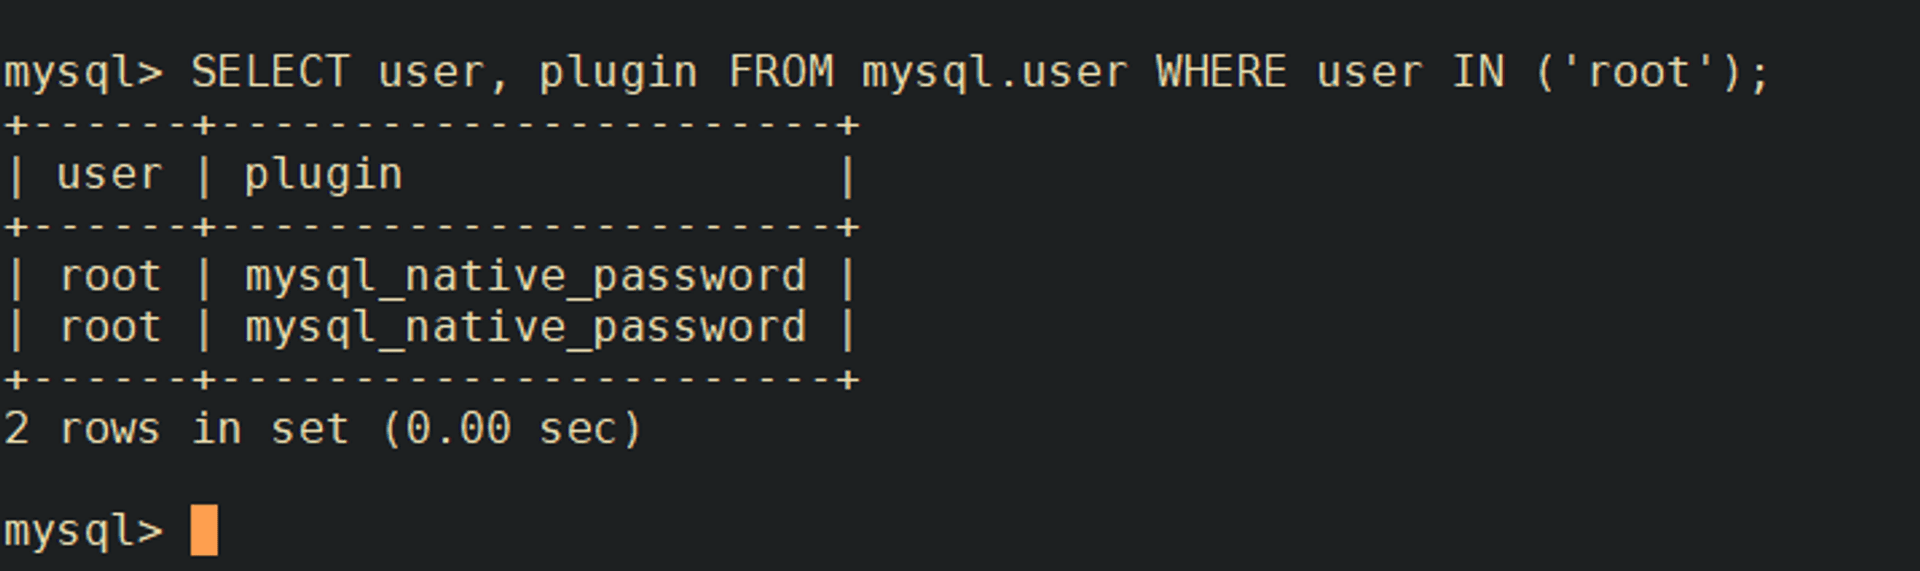
If your authentication plugin is now mysql_native_password, you're good to install Strapi.
Sidequest? Adding a MySQL User for extra security #
Note
MySQL also comes with some security considerations—a default superuser account called root is enabled by default, which can dump the whole database, or create and delete any user from the user management list, and this can be a security issue. It is often sensible therefore to create another MySQL user account, with a more restricted set of privileges for daily use.
Still to come... #
Next time, I'll install Strapi CMS onto Dokku and allow Strapi to talk to our MySQL instance. Last, we'll play around in GraphQL playground (built in to Strapi), querying our MySQL instance.
By the end, we'll be able to use Strapi as a small scale, headless CMS blogging engine, configured with MySQL—giving our blog access to security features and user permission management.